Create a Swift 5 Static Library
A simple and fast step-by-step tutorial

In this article, we will consider creating a static library for Swift 5 and its integration to another project.
The article is mostly like a step-by-step how-to tutorial and does not cover a lot of theoretical and historical topics. It also does not aim to consider all the possible cases where static libraries can be used or created.
It’s just a short and basic tutorial to create your first Swift static library for an iOS application as simple and fast as possible.
Create Static Library Project
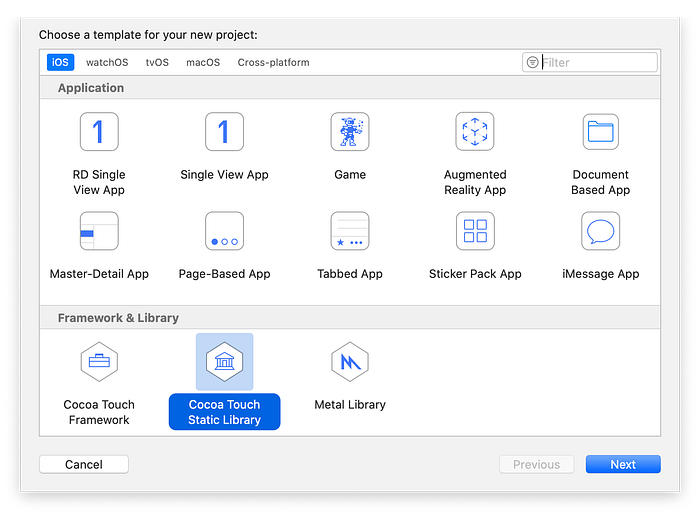
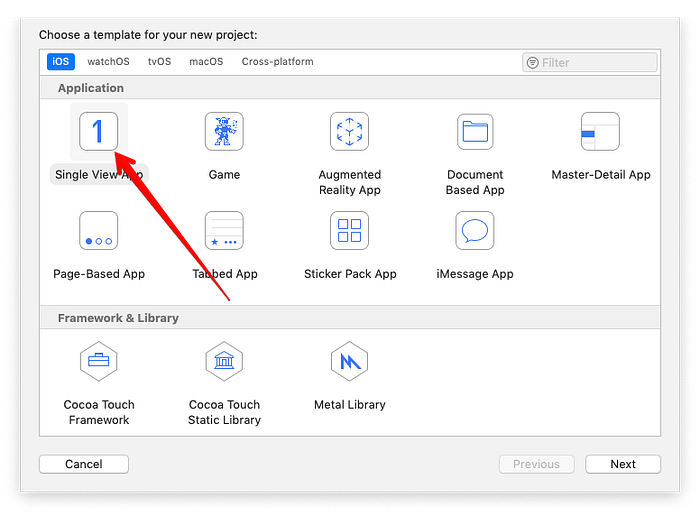
Let’s create a library project first. Open Xcode and select Cocoa Touch Static Library.
Give it a name and select Swift as the development language. In our case, we will call it Networking and assume that it will contain the code to communicate with a back end.

Press Cmd+N and select Swift file.

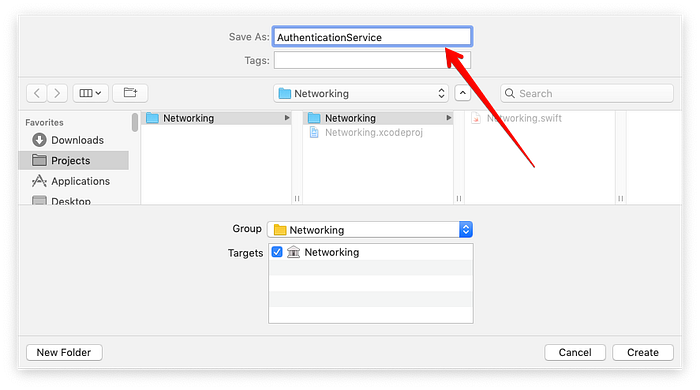
Give it a name, in our case, we will create a dummy class to communicate with the authentication part of the back-end API and call it AuthenticationService.
Paste the code below to the created file:
Important: Make sure you made your class and methods public. Otherwise, those methods and classes won’t be available from a project that you are going to use your library.
Moreover, you have to write an implementation for init and explicitly make it public.
Then, select any Simulator as a target to build.
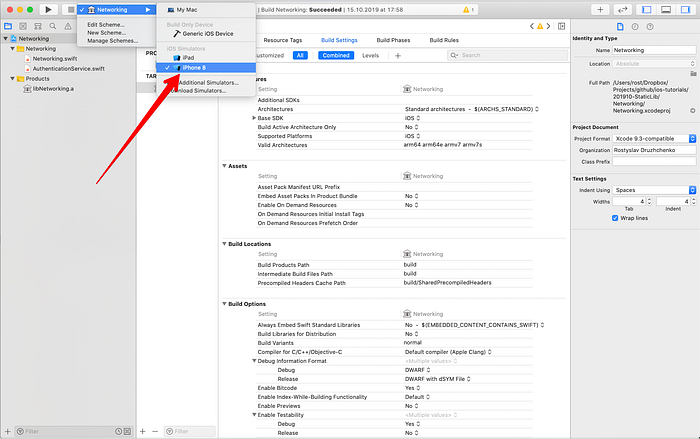
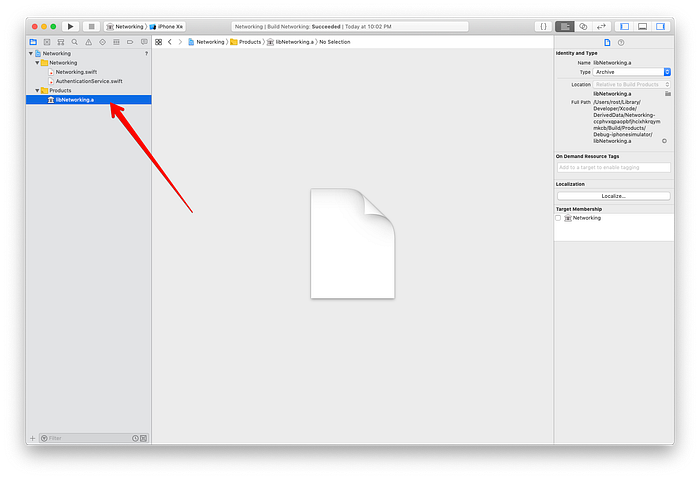
Then, press Cmd+B to build the project, and in the Project Navigator in the Products section, you will find a binary file called libNetworking.a.
Don’t mind the prefix lib, that’s fine. It’s the way Apple provides naming.
That’s actually it for static library creation. You’ve just built your library for the simulator. You can also build it for mobile devices, but in this tutorial we will skip it to keep the tutorial simple and concentrate on the general idea.
Integration to Another Project
OK, now that we have a binary code file, let’s use it in another project.
In Xcode, press Cmd+Shift+N and from the window that appears, selectSingle View Project. Press Next.
Call the project whatever you want, for instance, SimpleApplication, and press Next again.

After the project is created, we are ready to integrate the library we created in the previous section.
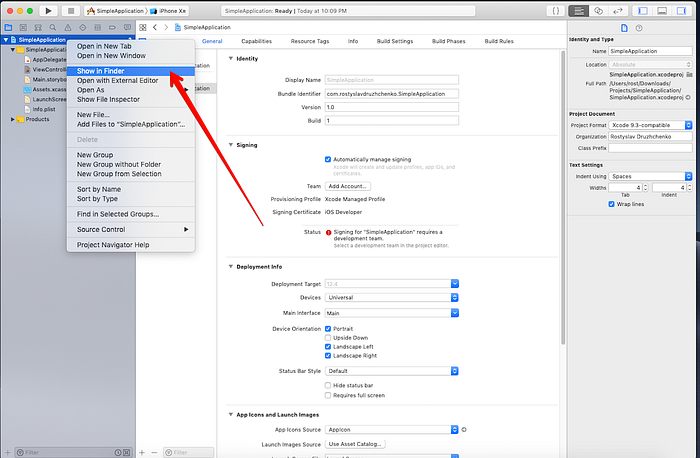
The first thing is that we need to add the compiled library’s files to the new project. To reach that, right-click on the project name in the project navigator and select Show in Finder.
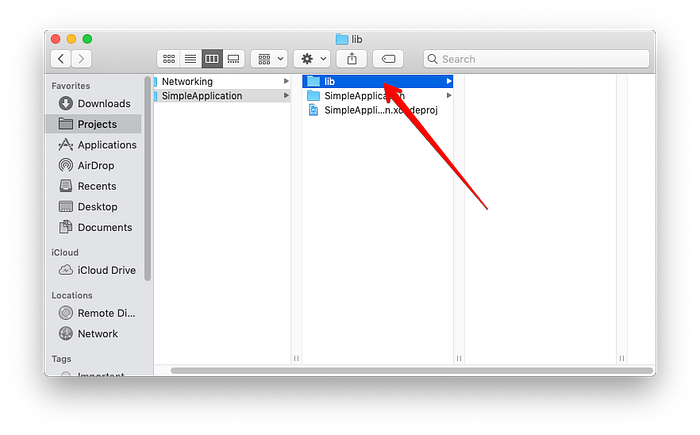
In the opened Finder’s window, create a new folder in the project’s root folder and name it lib.
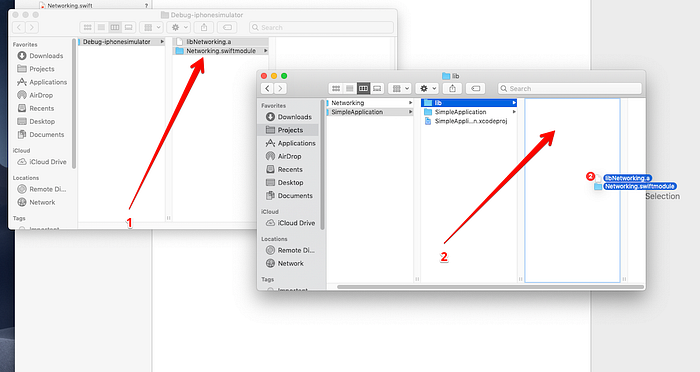
Go back to the library project in Xcode, find the file libNetworking.a in the project navigator, right-click on it, and select Show in Finder.
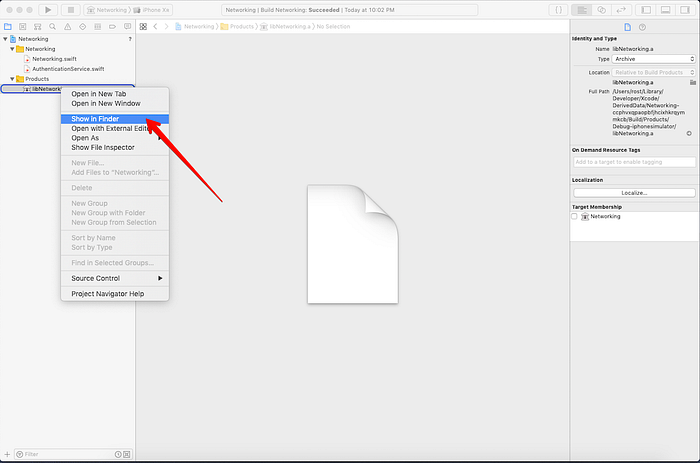
You will find the libNetworking.a file and Networking.swiftmodule folder there. Copy and paste them both to the SimpleApplication/lib folder.
Move back to Xcode and right-click on the project’s name again, select Add files to "SimpleApplication".

In the window that appears, make sure that the Create Groups radio button is selected, select lib folder, and press Add.

Now you have the library for your new project and Xcode even did some integration for you. Now your task is to check if it did it correctly and perform some additional steps.
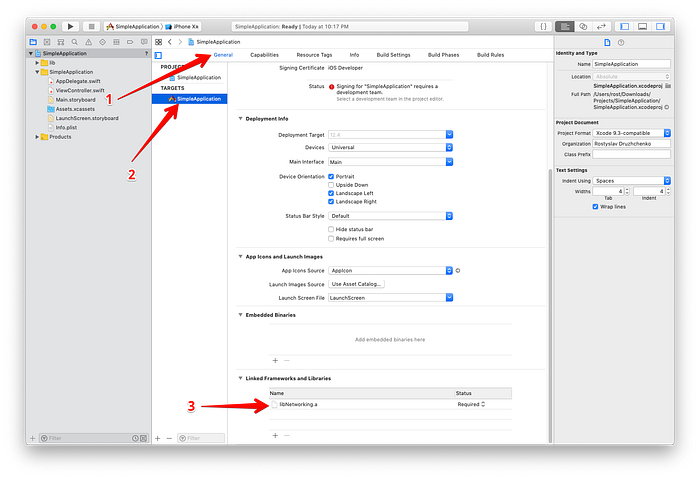
Select the project’s name in project navigator, then select General, and select your’s application target.
The section Linked Frameworks and Libraries has to contain a line with libNetworking.a. If it does not, press the + button and select it manually. Make sure that the Required status is selected.
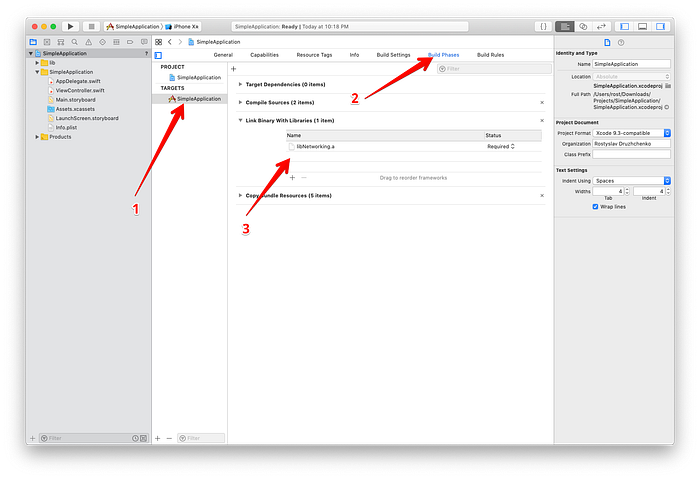
After that, go to the Build Phases tab, expand Link Binary with Libraries, and make sure that it contains a line with libNetworking.a. If it does not, again, add it manually and set it to required.
Finally, we’ve reached the last, and maybe the most sensitive integration step — setting paths. It’s a step where it’s very easy to make a mistake, so be neat and careful.
In the Build Settings (1) tab, select your target (2), select All (3), and Combined (4).
In the search field (5) in the top-right corner, type Search Paths. Copy the path from Library Search Path (6) and paste it to Import Paths (7).
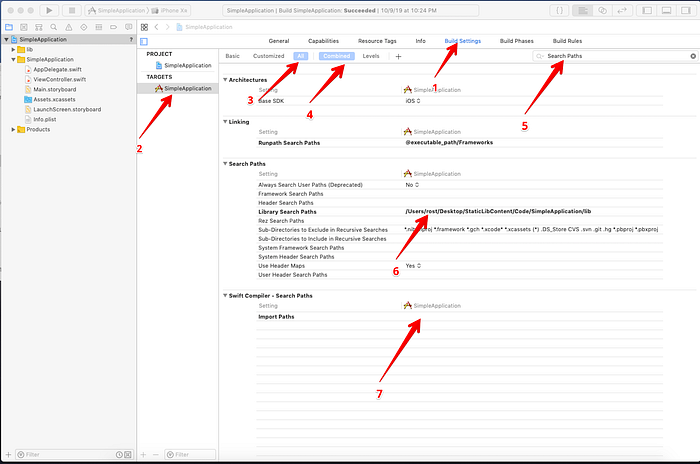
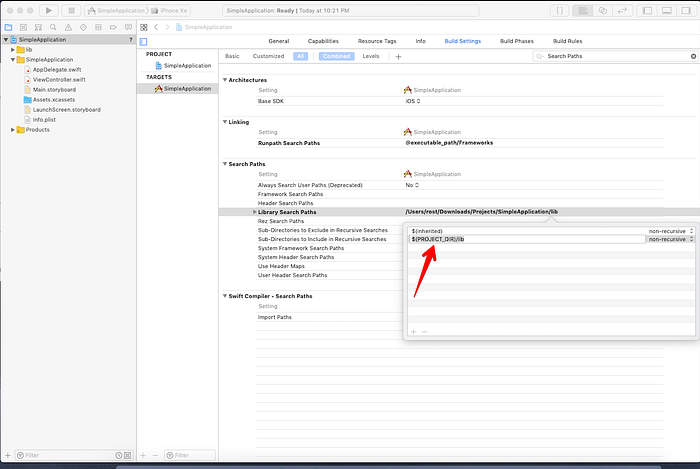
If there is no value in Library Search Path, add a new one, $(PROJECT_DIR)/lib. Do the same for Import Paths.
Then, go to your ViewController class and add the code there:
Let’s discuss this small piece of code.
// 1— ImportNetworkinglibrary. It will give you the ability to use the code from your library inViewController.// 2— Create an instance of a class that belongs to the library.// 3— Make a call for a method that belongs to the library and save the result to a local variable. For sure, we send some dummy data and receive a dummy response here.- And the last
// 4— print the result to the console. When you run your project, you have to see something like this:
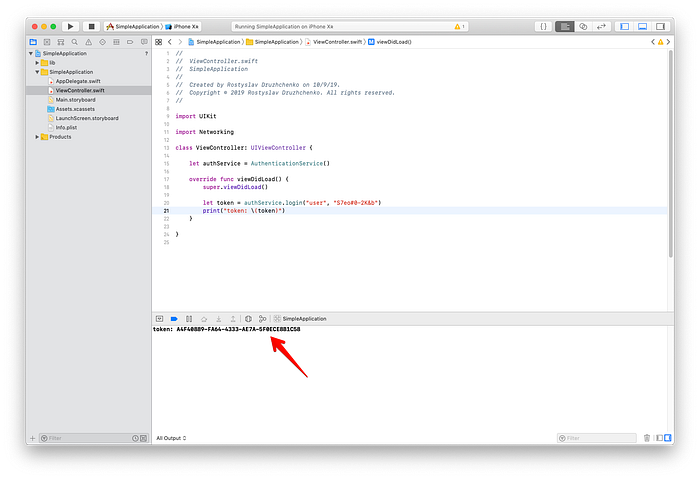
Of course, you will see another value for the token, as we program our method to return a random value.
That’s pretty much it. Now you have a working workflow to encapsulate your code to a static library, and you can extend it with the code that you need for your real-life project.
What’s Next?
As we mentioned above, in this article we described static library creation, only for the simulator. For sure, in most cases it’s not enough, and usually you need compiled code for both architectures, simulator and mobile device.
There is more. You have to make a single binary file that contains code for both architectures. It’s known as fat, or it’s better to say universal library. It will be the next step to do.
That’s finally it. Thanks for reading and don’t hesitate to ask any questions related to the topics described in the article.
Happy coding.
References
- https://github.com/drrost/ios-tutorials/tree/master/201910-StaticLib — You can download the ready-to-work project sources here.
- https://medium.com/better-programming/create-a-swift-5-static-library-part-2-8bea54bb0b9e — the second part of this tutorial.